
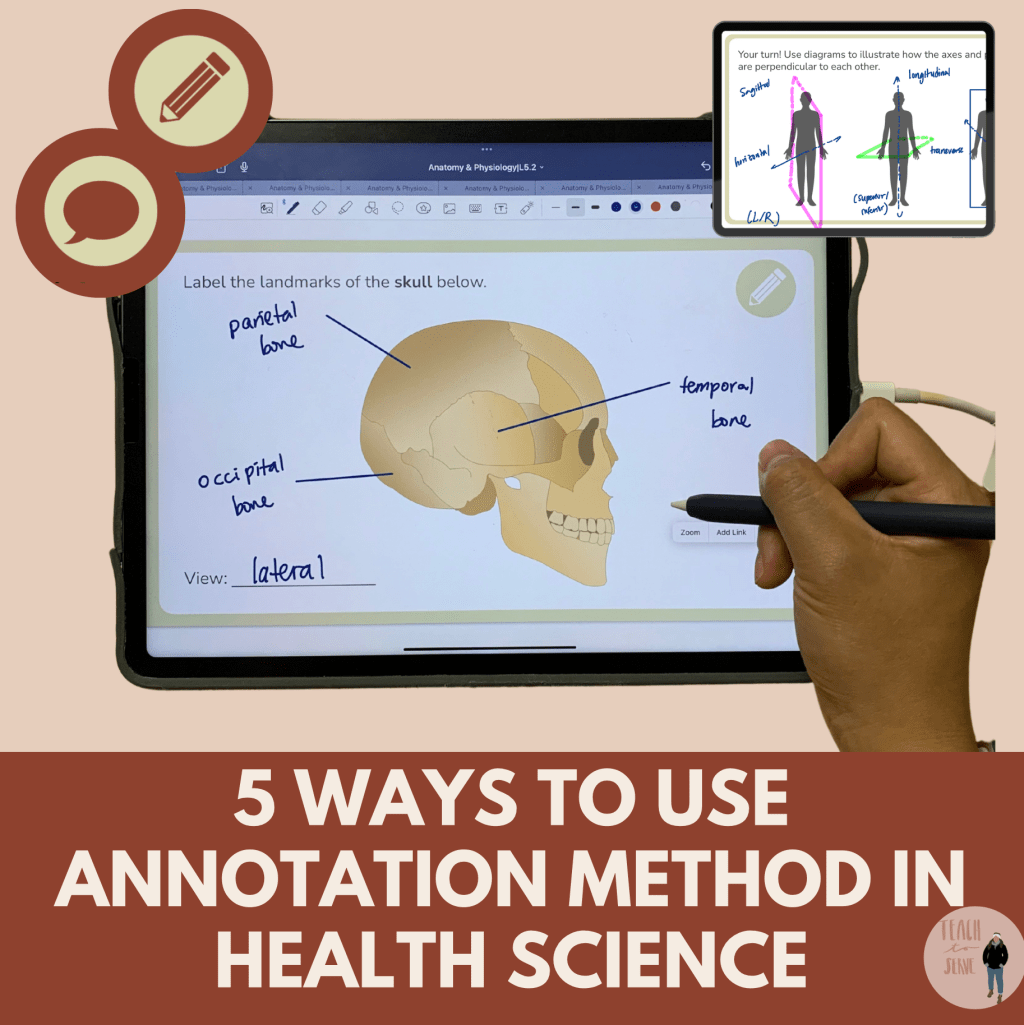
Hey fellow biology and anatomy teachers!
Ever feel like your students are just memorizing terms instead of truly understanding them? 🙋♀️ I used to see this all the time, especially with concepts like anabolism vs. catabolism in metabolism. They’d mix them up, forget them by the next test, and struggle to connect the dots.
That’s when I started using annotation as a strategy—and let me tell you, it changed everything. Instead of passively reading a textbook or copying fill-in-the-blank notes, students actively engage with the material, process it in real time, and actually retain it.
So, how can you make annotation work in your classroom? Here’s are FIVE quick actions you can try in your lessons:
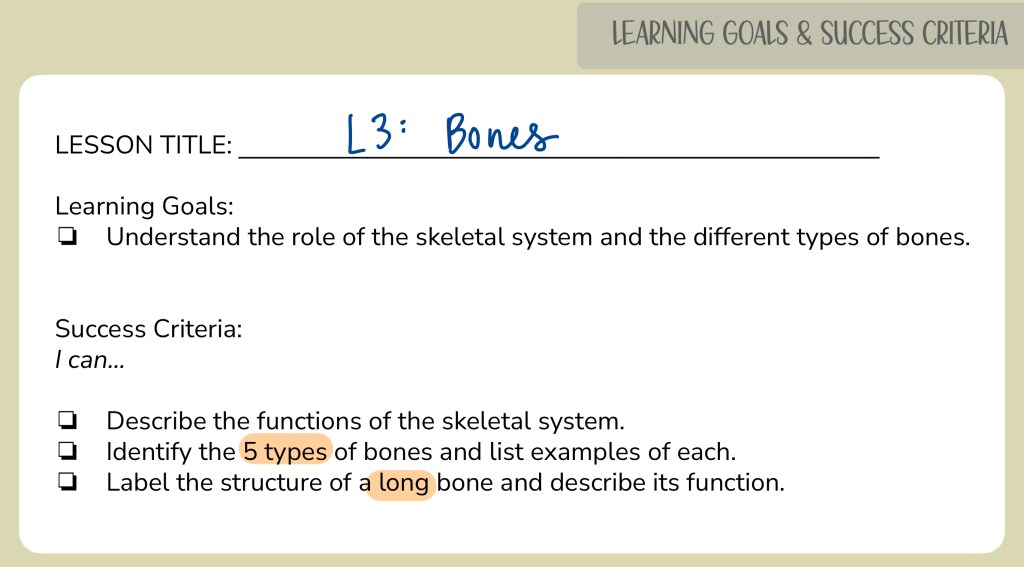
1️⃣ Start with Success Criteria
Before diving into content, set clear learning goals so students know exactly what they should focus on. This shifts them from passive listeners to active learners.
📌 How to do this:
👉 Show students the key objectives at the start of the lesson.
👉 Make them tangible—what should they be able to explain or apply by the end?
Here is an example of a typical lesson:
2️⃣ Gradual Information Release
Throwing a wall of text at students?
Nope. Instead, give them a blank or minimally filled-in handout and layer information in step by step.
📌 How to do this:
✔️ Have students highlight key terms and annotate definitions as you go.
✔️ Guide them through the process—don’t just give them all the answers at once.
Here is an example of how I progressed in this slide:
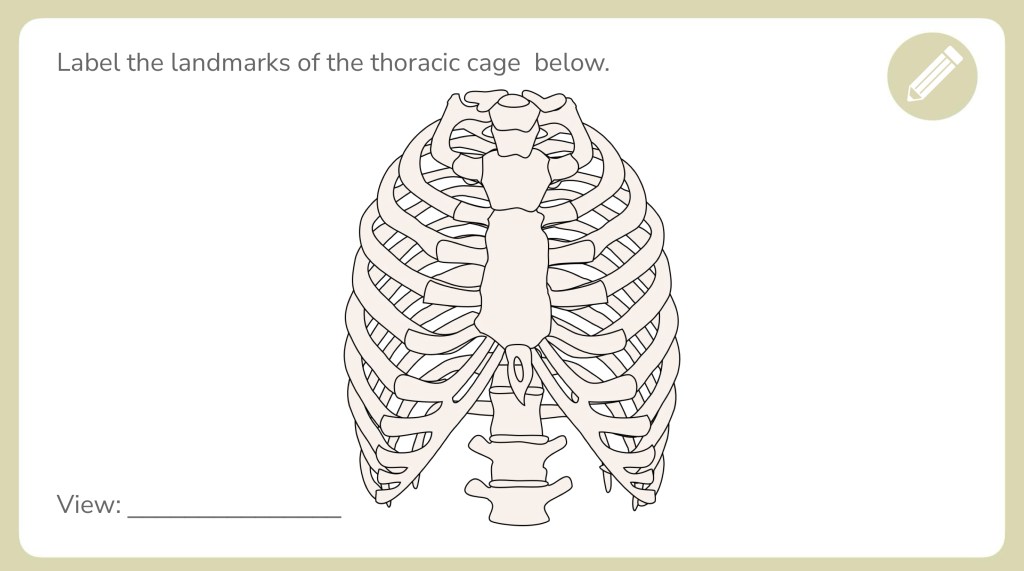
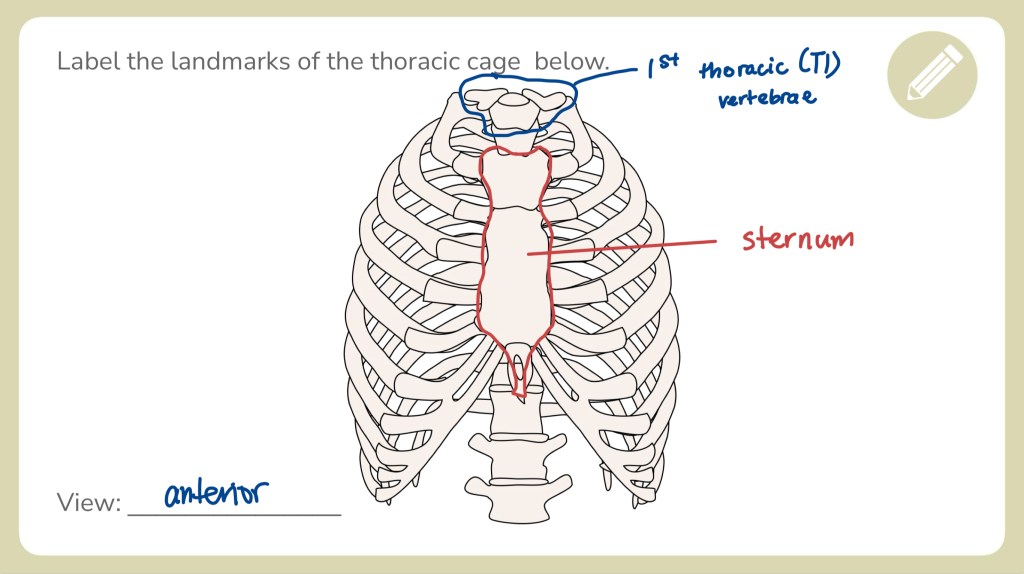
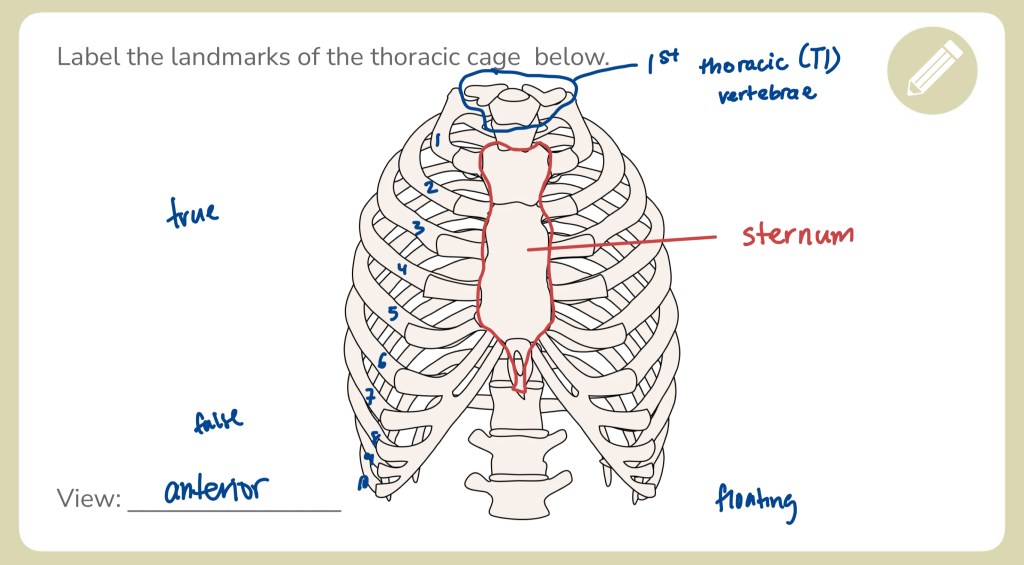
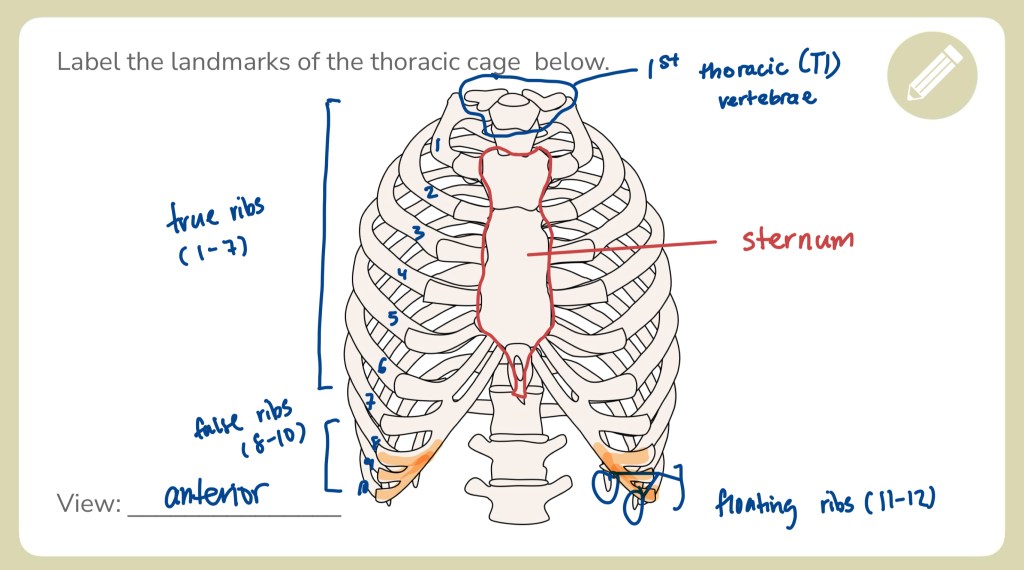
Step 1: Start with the view of the diagram (always!).
Step 2: Point out the obvious and distinctive features (ex: thoracic vertebrae and sternum).
Step 3: Number the ribs and then list out the three different types of ribs.
Step 4: Note the differences between the ribs.
3️⃣ Use Color-Coding for Visual Organization
This one is a timeless hack. Assigning colours to different concepts helps students categorize and recall information more easily.
📌 How to do this:
🟢 Axial skeleton
🔵 Appendicular skeleton
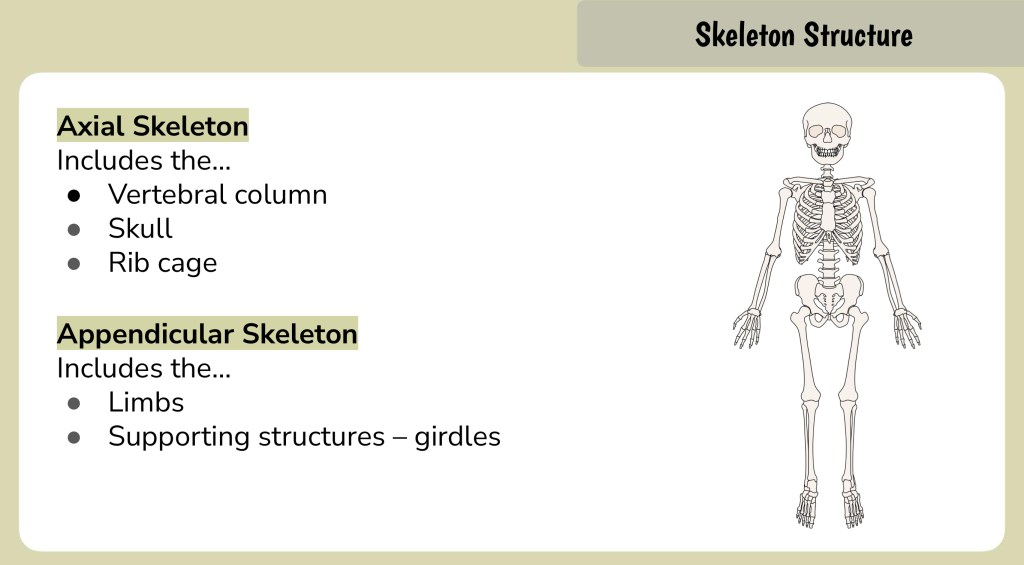

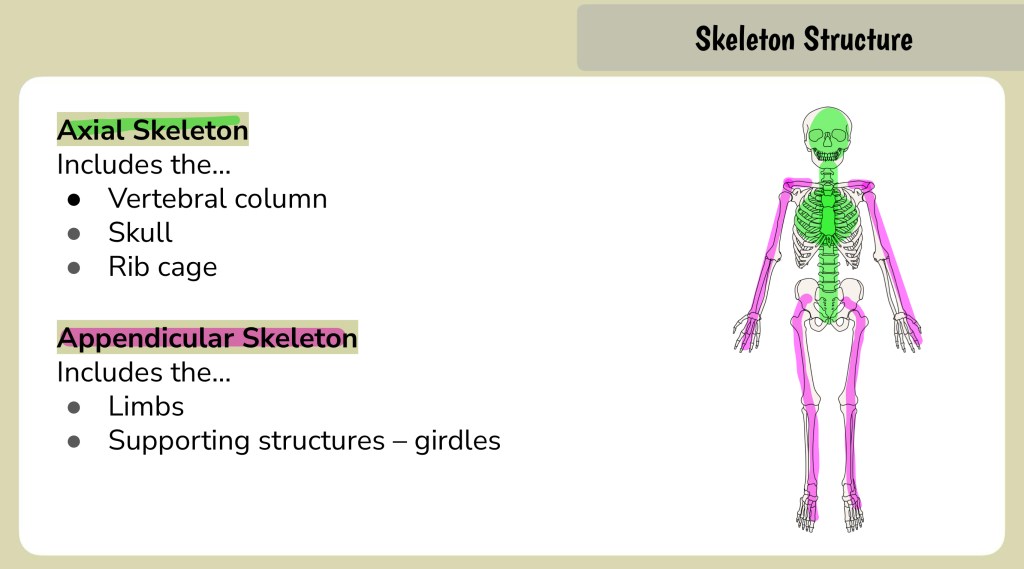

Step 1: Start with the main points (ex: the two major parts of the skeleton).
Step 2: Allow students to colour code based on the information provided on the slide.
Step 3: Annotate any additional information you would like the class to know (that aligns with the learning goal of this particular lesson.
It’s a small change, but visually organizing content makes a huge difference in retention!
4️⃣ Build in Engagement Points
Not every student loves raising their hand to answer questions (I get it!). But peer discussions? Way less intimidating.
📌 How to do this:
👉 Add slides with talking prompts where students Think-Pair-Share before moving on.
👉 Have an “engagement slide” where they circle key ideas with a partner before discussing as a class.
Here is an example of a built-in engagement slide:
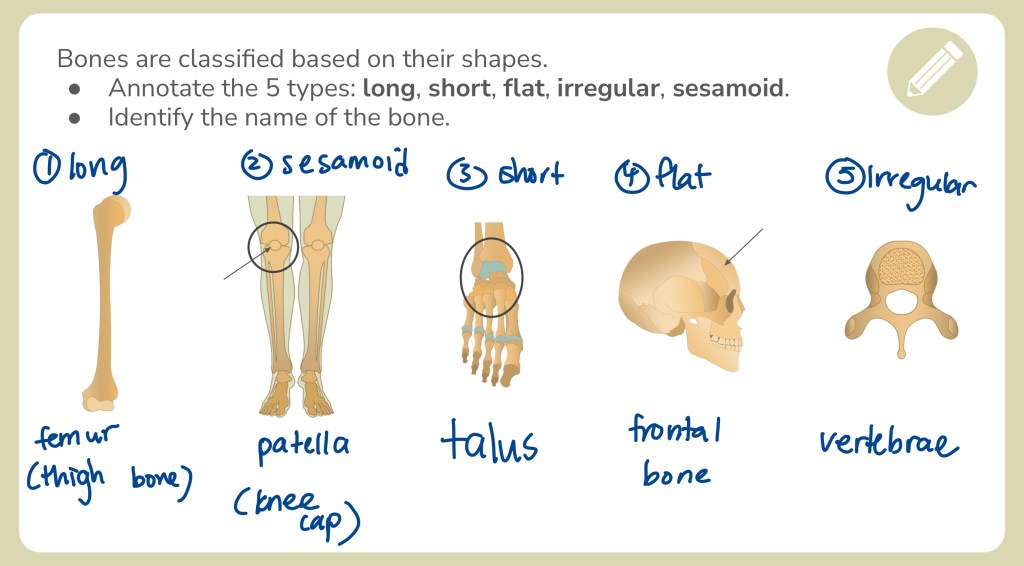
TYPES OF BONES
Inviting students to practice identifying the (common) name of the bone allows them to make connections to their existing understanding. This is a quick way to assess students’ understanding informally.
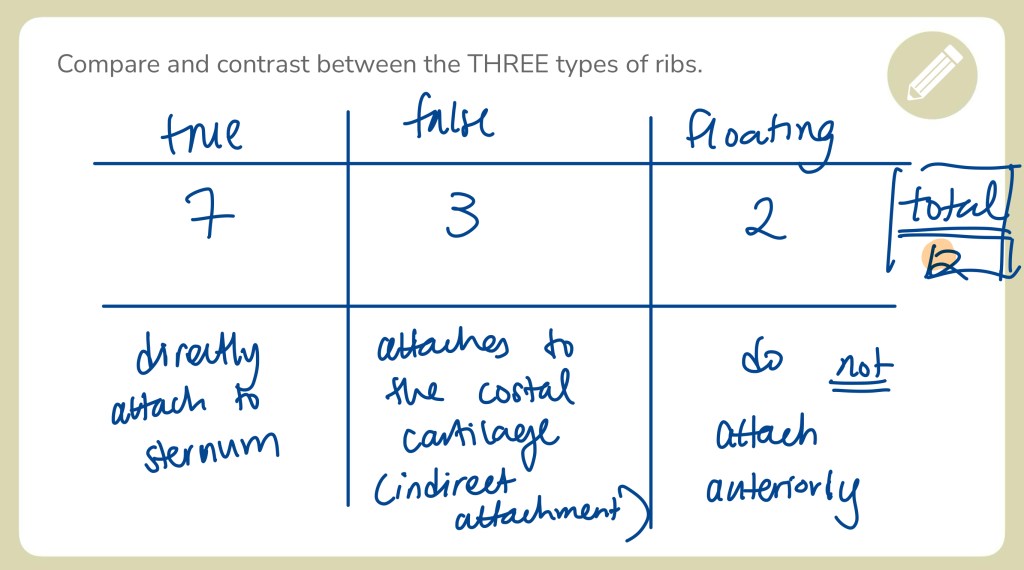
Here is another example of a built-in engagement point:
COMPARING THE TYPES OF RIBS
This is a follow-up slide for students after they had just learned about the differences between the types of ribs. Naturally, this will encourage them to think critically and organize their understanding in a meaningful way.
This gets everyone involved—even your quietest students.
5️⃣ Model the Process Every Single Lesson
Annotation isn’t just a one-time thing. It works best when it becomes part of your daily teaching routine.
📌 How to do this:
👉 Write notes WITH students instead of just showing pre-made ones.
👉 Say out loud exactly what you’re writing and why.
👉 By the end of the year, they’ll be annotating like pros—and this skill will follow them into university!
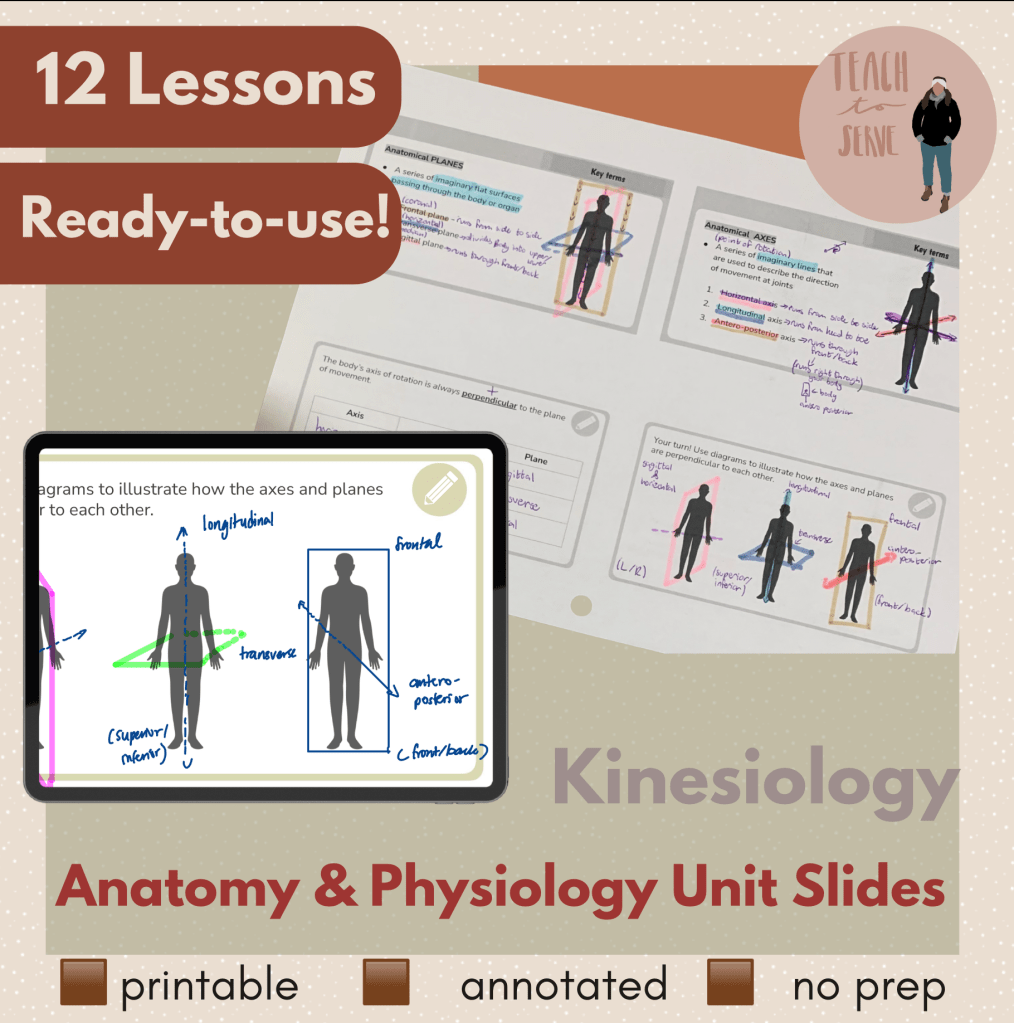
If prep time is non-existent for you and you need something already made, check out this resource: PSK4U Kinesiology Anatomy & Physiology Unit Interactive Lessons & Notes (PPT).
Join my mailing list for more tips like this!
What did I miss? Comment below! 🙂 Which one of these are you already implemented in your classroom?
Comment your questions, and let’s chat about how you can start using this in your own lessons!

Leave a comment